Strawberry Fields Forever…..

It’s that time again…..strawberry jam time, that is! Two days ago, I made my annual pilgrimage to the strawberry fields at C.N. Smith Farm to pick my own strawberries. I did plant some strawberries in a container just outside my kitchen door this year, but every time a strawberry gets close to turning red, the chickens help themselves.  By the way, chickens LOVE strawberries…toss some into the yard and it’s a feast!!

IMG_4015

So off to the fields I went……..the strawberry fields at the farm are vast. And of course I waited until the middle of the day right in the middle of the summer heat to venture out.

IMG_3993

Luckily for me, the clouds rolled in to block out the light and heat of the sun. I picked 6 quarts of beautiful berries in about an hour. But seriously–these berries are gorgeous!

IMG_3992

IMG_3998

So first, you get the goods home, hull them, wash them, and cut them into little pieces.

IMG_4013

Then, you put them in a pot with your sugar and lemon juice. Mash up the strawberries to the chunkiness consistency of your liking. If you like it really smooth, I would suggest using an immersion blender.

IMG_4025

Heat this pot of goodness on medium until the sugar has melted, then turn the heat up until you get the mixture to the boiling point. Let it continue to boil at a low rolling state for about 30 minutes.

IMG_4027

When it’s ready to pour up, or “set”, it should pass the “crinkle” test. Basically, you put a little plate into the freezer when you get started making the jam, take it out when you’re ready to test and drop a dollop onto it. Let it sit for a minute or two and if it crinkles when you nudge it with your finger, then it’s done. As I neglected to take a picture of this step when I was actually doing it, I’ve nicked someone else’s from the Internet. Thank you to whomever did take this picture. It is from the Food Fanatic website. That is not my finger.

th

Don’t fret if you have to let it rumble around in the pot a little bit longer than 30 minutes. That’s actually just when I start testing it. I don’t really like to use commercially prepared pectin, and strawberries contain their own naturally. So depending on the amount that is in your strawberries, it is not unusual to require a longer boiling time.

When it’s all set, pour the mixture up into your previously sterilized jars, put the lids and rims on and pop them into a pot of boiling water for about 10 minutes. At this point, you can take the jars out and put them on a cooling rack to cool overnight. And this is the best part–you’ll hear the popping of the lids as they seal! I never tire of hearing that. It’s one of my favorite sounds on the planet.

And the 6 quarts of berries that were picked yesterday turned into 6 pints of fantastic jam today. I kept one quart aside for us to snack on, so technically only 5 quarts turned into 6 pints. But you get the picture.

IMG_4066

IMG_4070

IMG_4071

IMG_4082

Super Easy No Pectin Strawberry Jam
Ingredients
5 quarts freshly picked, juicy strawberries
3 cups sugar
1/2 cup lemon juice
Instructions
  1. Wash, hull, chop the strawberries.
  2. Combine the strawberries, sugar and lemon juice in your pan on the stove. Stir over medium heat until the sugar is dissolved. You can mash them with a potato masher or use an immersion blender here.
  3. Increase the heat and boil for 30 minutes. Stir frequently.  Skim off the foam frequently, as well.
  4. Do the crinkle test until you have positive crinkle.
  5. Pour the jam into hot sterilized jars. Leave about ¼ of space from the top. Put the lid on and the ring on.
  6. Put the jars into boiling water. Boil for 10 minutes. Take the jars out of the water and place on a cooling rack where you can let them cool overnight. When you hear the popping sounds, rejoice!! 😀


twitterpinterestinstagram

The Quilt.

Soooooo……about a year and a half ago (maybe a little longer, but who’s keeping track??), my best friend’s husband, Steve,  decided that it would be a good idea, since he had retired, to have a quilt made out of all of his ties that he wore over the years to work.  More specifically, he decided that I should be the one to make the quilt, since I’m one of the few quilters that he knows personally. I very naively agreed with him that this was a phenomenal idea and that I would do it. One thing, though. Ummm….I had never worked with silk before and had not realized what a ginormous PIA this would be. Nonetheless, I had agreed to take on this project, so I set out to complete it. I won’t lie. When I first started working on it, if I could have backed out gracefully, I certainly would have. But a promise is a promise.

The first surprise was that he actually packed up (very neatly and super organized) several boxes filled meticulously with 200+ rolled up ties. He then proceeded to mail them from Georgia to Massachusetts. Seriously, people. This picture does not include all of the boxes.

IMG_3795

After I had recovered from receiving all the boxes filled with ties, I had to get on with the process of deciding what type of quilt, specifically what PATTERN. On the surface of things, this seems like a simple task. But trust me, when you take the time and make the effort to construct something from scratch with your own two hands, you want the recipient to LOVE it. It must be perfect. I wrestled with this for a while. When you look on the internet for ideas for a tie quilt, most of what you find are silly, comical patterns. Knowing that Steve has true love and respect for traditionally pieced quilts, and also knowing that Erin (the biffle, his wife) would have to tolerate the quilt in her presence, it seemed that a “real” quilt was the right way to go.

During a conversation with Erin some time later, she casually mentioned the quilt (and how much she loved it) that is on the bed on the British sitcom “As Time Goes By”. I replied that I had never noticed it. Her response? “How have you, the quilter, never noticed this?”.  I will admit she seemed a little incredulous. 😉  I made a mental note to do a web search for it later. It really is a nice, traditional quilt, don’t you think?

th

When I saw it, I thought it was the perfect way to blend the history of Steve’s ties with something Erin loved, as well. Since she would have to look at it every day, seemed only right.  Then I had to get down to work. The quilt pattern itself was easy to replicate. It’s just big pinwheels. I then chose which ties I would use for the quilt and deconstructed them. This one used to be Steve’s “fine Republican tie”. Hey! No room for politics here!

IMG_2016Then I had to figure out exactly how to work with the darned silk they’re all made out of. Seriously Steve, you couldn’t have had the forethought to find some nice cotton ties for me to work with?? Surely you could’ve thought of this 20-30 years ago when you were buying these ties. 😉

Figuring out how to work with the silk was a bigger task than you would’ve imagined. It’s so slippery and uncooperative!! Turns out, all I had to do was ask Stacey at Heart in Hands Quilt Shop and she could’ve taught me. Which she did. Which made the rest of my tenure with the quilt infinitely easier. Turns out there’s this iron on backing you can use to make it not so unwieldy….

IMG_2927So I would cut the backing out in the size I wanted, then iron it onto the deconstructed tie. Once this step was completed, it enabled me to cut the silk into the shape I wanted so it could be sewn together to form the final square. Woohooo!!

Once I started accumulating squares, I started piecing them together.

IMG_1500

IMG_2573


Once I had all the squares constructed, I laid them all out to determine the correct color sequences and started sewing them together. First, I sewed them into long rows. Then I sewed all the long rows together. There were many long nights sewing and ironing by the fire….

IMG_3421After that, I sewed the borders on. When I was finished sandwiching the top of the quilt with the batting (all organic cotton, of course) and the backing, the top stitching was completed.  Then all that was left was stitching the binding into place. I hand stitched that into place, just because I love the look of that so much better than the machine stitched look.

IMG_3748

I think the finished product is beautiful. So much so, that I plan to enter it into the Marshfield State Fair quilt competition.

IMG_3787

So, even though it started out as a painful project, it actually turned out to be quite a lot of fun to make. (Don’t tell Steve……)


twitterpinterestinstagram

Everything’s coming up roses….

Well, maybe not roses proper, but everything sure is blooming! IMG_3282

The lilacs have come and gone, but the were as resplendent as ever this year.  They are breathtakingly gorgeous and smell delicious. My photos do not do them justice……..must work on that.  IMG_3279There’s an entire row of them that runs across the length of the front of our property.  They very nicely shield us from the busy street.


IMG_3387Gertrude’s irises have begun to bloom as well.  There’s all different varieties. They are all beautiful.

IMG_3386


George’s favorite is the White Siberian Iris.  It’s very small and delicate. IMG_3569


The clematis is climbing up the north side of the house…..

IMG_3564IMG_3565


My geraniums are the most brilliant color of hot fuschia pink I have ever seen! Okay, this particular one could use a little deadheading…….

IMG_3295

The dogwoods have already reached their peak and passed it, but they were lovely, too.


The birds seem to have brought us a few, um,  presents this year, too. A new poppy appeared this year where there was none before……..

IMG_3585And a lovely foxglove has also sprouted for the first time….

IMG_3561


Cleo totally photobombed this picture. She’s running with one of her favorite toys here.


    Even the okra is starting to bloom!IMG_3640


One of the most breathtaking sights around here these days, though, is the rhododendrons. Someone, at some point long ago, did a beautiful job of planting these delightful bushes. They are big enough now to be pruned as trees, but really shouldn’t be. In the blizzard of 2013, several of the ones that had been pruned to look like trees split into pieces, due to the lack of support underneath and the weight of all the snow. They seem to have recuperated okay, but we are trying to let them grow back as the bushes they are intended to be. IMG_3593Little Cleo seems to get herself into a lot of my pictures…. 🙂


They come in all shades of pink………

IMG_3579


I love the view from the butler’s pantry window…..

IMG_3594The bees seem to love the blooms, too.

IMG_3651

I wish this time of year could last forever. As I’ve said many times before, Spring is my favorite season, but as summer has actually just begun,  I’m happy to move forward. There are fun things to do in the summer in New England. But I’m sure I’ll be missing the Spring and all it’s charming attributes. So for now, all is well on Isaac Brown’s Farm.

IMG_3584

twitterpinterestinstagram

Spring is here. Wait, what? SPRING IS HERE!!!

And it couldn’t have shown it’s long awaited face a minute too soon! After the horrible winter we here in New England have just been through, the first 40 degree day felt like there might be a chance that we’d actually survive. Of course, it’s currently the middle of May, and I’m not real sure we’ve broken 75 degrees yet, but I don’t care. Surviving the brutal winter and finally seeing the beginnings of Spring have renewed my faith in the human spirit.

IMG_2855The chickens finally came out of their coop (after 6 weeks of captivity! Ouch!). We did not lose a single chicken over the winter. For that, I am thankful. We’ve actually just gotten some brand new baby chicks. More on that later……

And egg production is back in full swing! I didn’t realize how much I had missed my daily fresh eggs!


IMG_2953

The dogs love being outside again. Turns out, we were all sick of being trapped indoors. Although Cleo is a poodle–not known for their herding capabilities–she does a pretty impressive job of keeping the chickens in line. Whether they need it or not! Here she is in action……

IMG_2958IMG_2956

So at this point, my attention has fully turned to Spring-type activities. Getting the garden going, putting all the winter clothes away, spring cleaning, sleeping with the windows open, all things soul-renewing for me are in full throttle now. Let Spring begin!

twitterpinterestinstagram

Winter is Upon Us Now….

It should’ve grabbed my attention that I had to put on snow shoes to climb up to the roof of the chicken coop to shovel off the foot of snow that had accumulated there. But it didn’t. Activities of this nature have become the norm around these parts lately. It’s winter in New England! And Mother Nature apparently LOVES us. Or maybe she hates us. Can’t decide which. In less than 4 weeks’ time, we have gotten 90 inches of snow in southeastern Massachusetts. Just to put it into perspective, the average amount of snowfall in this area is 36 inches over an entire season. Nothing average about us this season!

IMG_2710That’s the chicken coop before I shoveled off the top. It’s a tough season to be a chicken here! They’re doing just fine, though. They haven’t been out of the coop for almost 4 weeks, which seems awful, but it’s safer for them. And right now, trying to keep them entertained, fed, safe,warm seems more important than letting them kick around the property.

The pups don’t really seem to be enjoying the season like they have in the past. Probably just because it has been so darn cold here. IMG_2688That’s just outside the back door.  That’s about as far outside as they’ll get. Nice little dusting of snow we’ve gotten, huh? This is their preferred roosting spot….

IMG_2651


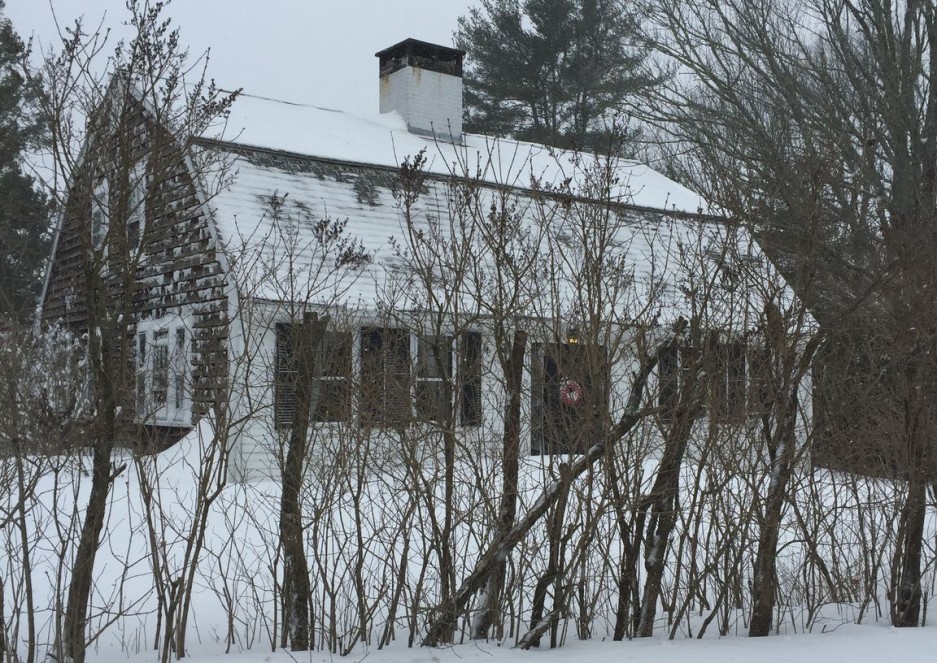
The house seems to have withstood the back to back blizzards we’ve gotten without any issues. There’ s something to be said for the type of construction that was used 250 years ago. 🙂  This is a picture of the house during the latest blizzard. Can you find it?

IMG_2673

Yikes! But this is shortly after….. so much better.  You can see that the snow is just barely touching the bottom of the wreath on the front door.  Oy.

IMG_2682


The garden we will toil over in the summer is but a dream at this point in time. But I did sow some onion seeds indoors this past week. That’s super exciting. As I was scraping off the chicken coop today, I looked out over the garden. It is buried in snow! Just so you know……those are approximately 10 foot posts you are seeing here…

IMG_2714


With all the extreme weather we have had lately, I often wonder how our forefathers were able to survive in the early days of this country. I think particularly about the initial occupants of our house. I think about things like where they must’ve kept the woodpile (certainly not where we have it–way too far away from the house!), or how they were able to preserve food for the lean months. But right now, all the shoveling is done for the day, I’m sitting by the fire with my husband and the dogs and all is well.

Happy are we. 🙂

twitterpinterestinstagram

The last of the summer tomatoes…….

IMG_1817


Every winter, I avidly read anything I can get my hands on—–books, magazines, etc–about gardening, self-sufficiency, putting food by, etc., and dream about the warm weather months to come and how phenomenal my garden will be. I envision providing George and myself with all the produce we will need to get through the freezing cold winter months. I imagine us hauling in tomatoes, beans, peas, lettuces, peppers,etc., by the bucketfuls. Then Spring arrives and I have all good intentions, but invariably, I get distracted. This year’s excuse was that I was in school again full time, complete with 300 clinical hours to finish. Sigh.

IMG_1743

But I did manage to get the tomatoes planted and harvested.  My heirlooms actually did quite well! I used a method that was new to me called The Square Foot Gardening method. You can find more about that at www.squarefootgardening.org.  Once I got everything set up, I found this method to be so much easier than the traditional ‘row planting’ method of gardening. There were very few weeds and I was able to produce a more bountiful harvest from a much smaller space. Basically, all I had to do post-planting was go out every afternoon to water the plants. Almost anybody can do that!

So what do you do with loads of tomatoes at the tail end of summer?  You can them, that’s what! And last week, when almost all the tomatoes had been harvested, canning day finally arrived. It took about 6 hours start to finish, but I wound up with a pretty good haul.

First you wash them….

IMG_1825

You have to make sure all the jars are sterile (and that you have enough!) …….

IMG_1816

After the tomatoes have been washed and peeled, toss them in the pot and cook them down until they’re stewed, about 30 minutes or so.

IMG_1823

After all that, the tomatoes are poured up into the clean jars and sealed.  18 quarts of canned tomatoes later………..

IMG_1824

So now that the tomatoes are all canned and put away, I can remember the days of summer during the dead of winter. Every time I reach for a jar to make a pot of vegetable stew or chili or spaghetti sauce, I’ll think about my little summer garden and the cycle will continue. I’ll dream about next year’s garden and vow to make it better. And that will keep me warm all winter long…….


twitterpinterestinstagram